-By Dr Pauravi Hegde MDS, Endodontist Specializing in Crafting the Perfect Smile
Introduction: Why Laser Whitening is the Talk of Mumbai
Picture this: you’ve decided to invest in a laser teeth whitening session, excited to see your teeth sparkle like your favorite Bollywood star’s. Perhaps you’ve been scrolling through Instagram and seen those dramatic before-and-after shots, or maybe a coworker in Chembur turned heads after their recent whitening appointment. Regardless of how you found out about laser whitening, one question often lingers: How can I make sure it’s as comfortable and effective as possible?
As Dr Pauravi Hegde MDS, I’ve witnessed countless patients from Sion, Prabhadevi, Worli, King’s Circle, and Chunabhatti flock to laser whitening for its speed and bright results. Yet, not everyone realizes how essential the pre-treatment process is. With the right prep, you can dodge discomfort—or worse, an underwhelming outcome—and ensure a glow-up that’s genuinely worth the investment.
In this article, we’ll unveil 3 essential steps for a pain-free laser whitening session. Think of these as the “warm-up stretches” before an intense gym workout: if you skip them, you might power through, but you risk unnecessary aches and complications. Ready to learn how to prime your teeth (and yourself) for an easy, successful whitening experience? Let’s dive in.
Understanding Laser Whitening Basics
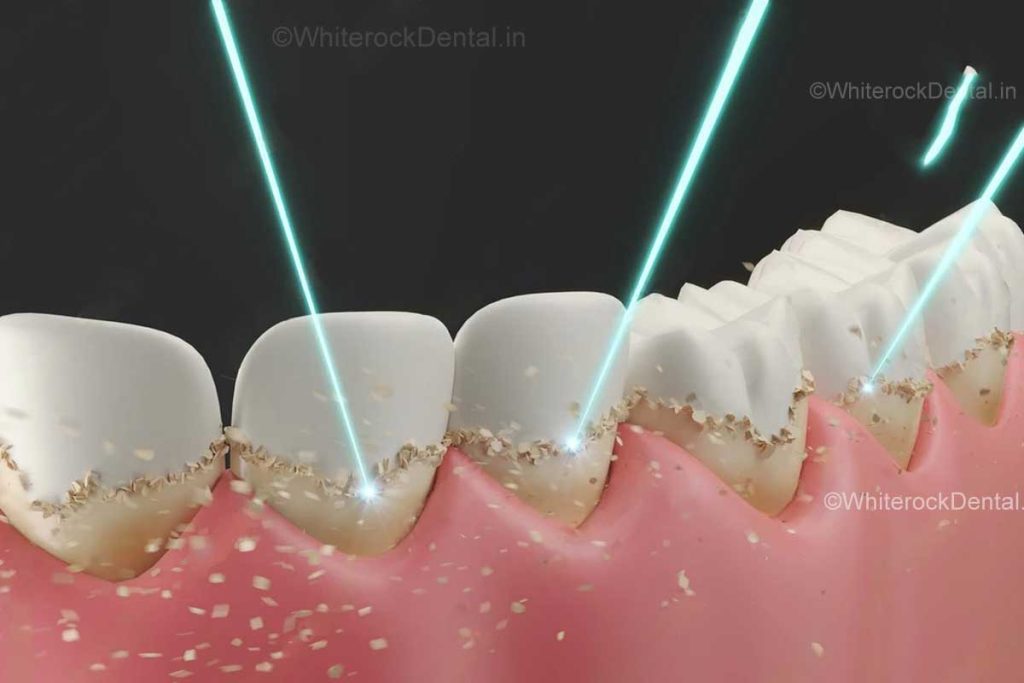
How Laser Whitening Works
Laser whitening is a high-tech spin on traditional bleaching methods. Instead of just applying a gel and waiting, your dentist (like me, Dr Pauravi Hegde MDS) uses a laser or specialized light to accelerate the process. This allows the bleaching agents (often hydrogen peroxide or carbamide peroxide) to penetrate tooth enamel more effectively, knocking out stains and discoloration in a shorter time than standard treatments.
- Faster Results: One of the big draws is how quickly it lifts stains—great for last-minute events in Worli or spontaneous photoshoots around King’s Circle.
- Intense Power: Because it uses a more potent gel plus laser activation, you often see dramatic color changes in just one session.
Why Prep Matters
You might wonder: “If the laser is doing all the work, can I just show up?”
Well, you could, but you’d be missing out on crucial steps that minimize pain and boost effectiveness:
- Comfort: Some folks naturally have sensitive teeth or gums. Prepping ensures any existing issues—like mild cavities or gum inflammation—don’t flare up.
- Consistency: Clean, healthy teeth respond better to the bleaching agent, leading to an even, bright outcome.
- Safety: A careful check-up can spot potential pitfalls that might cause trouble mid-session.
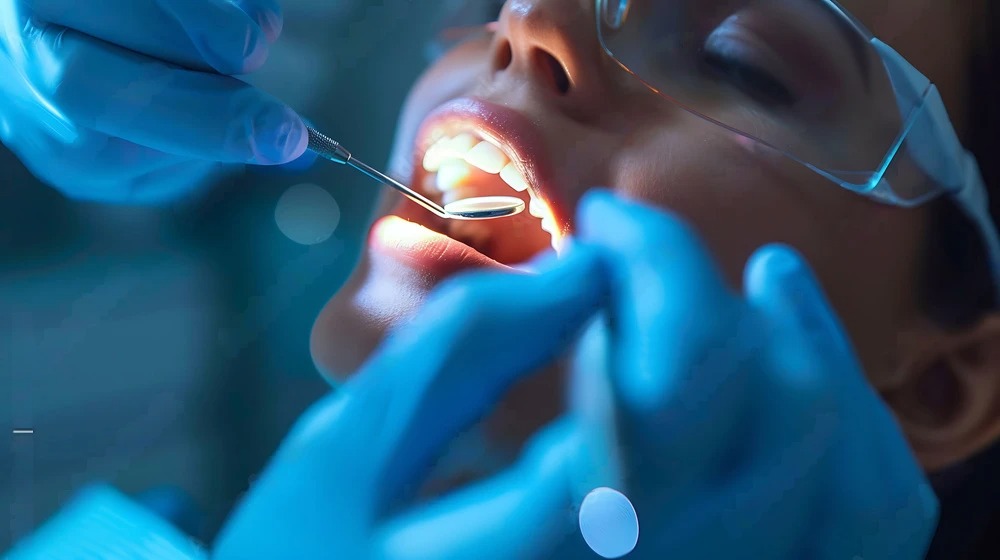
Essential Step #1: Schedule a Pre-Whitening Check-Up
Identifying Underlying Dental Issues
Laser whitening is powerful, but power can be a double-edged sword. If you have untreated cavities, gum recession, or hidden fractures in a tooth, shining a laser and applying potent bleaching gels might magnify pain or worsen these issues. A short exam—often just 15–20 minutes—can help your dentist pinpoint problems like:
- Mild cavities: These can become very sensitive if bleaching gel seeps in.
- Tartar build-up: Might interfere with gel penetration, causing uneven results.
- Cracks or fractures: Could let bleaching agents irritate the inner pulp, leading to throbbing pain.
Professional Cleaning
Many patients don’t realize how essential a quick scale and polish is before whitening. Plaque and tartar act like barriers, preventing the gel from uniformly brightening your enamel. By polishing off surface stains or plaque, you’re ensuring the bleaching agent contacts your enamel directly, so each laser pulse is more effective.
Allergy & Sensitivity Check
If you’ve ever used at-home whitening strips or mouthwashes and felt a “zing” or ache, let your dentist know. They might apply a desensitizing gel pre-laser or choose a milder concentration of bleaching agent. This step ensures you don’t squirm in the chair halfway through the session.
A Quick Anecdote from Chembur
One patient from Chembur—let’s call her Rina—booked a laser whitening session on a whim. No pre-exam, no heads-up. Ten minutes in, she felt a sharp jolt. Turns out she had a small cavity brewing. We paused, sealed the cavity, and rescheduled the whitening. She admitted that a quick check-up beforehand would have saved her an extra trip and that uncomfortable surprise.
Essential Step #2: Adjust Your Diet & Habits Pre-Session
Reduce or Avoid Staining Foods
A few days before your appointment, consider cutting down on coffee, tea, red wine, or dark sauces like soy sauce or tamarind-based gravies. Why? If your enamel is already heavily stained, the laser session might need more rounds of gel application, which can mean extended contact time—potentially increasing sensitivity. Also, brightening results can be more noticeable if you’re not layering new stains right before bleaching.
Quit or Cut Down on Smoking
Nicotine not only discolors teeth but also irritates gum tissues. Freshly whitened teeth—especially those about to undergo laser—are more prone to dryness and heightened sensitivity if you smoke heavily. If quitting cold turkey isn’t realistic, at least scale back for a week or so. Trust me, your gums (and lungs) will thank you.
Boost Hydration & Oral Care
- Water is your ally. Drinking enough water flushes out leftover pigments and helps maintain saliva flow, which naturally defends against bacteria and plaque.
- Consistency: Continue your normal brushing routine—twice daily—but pay special attention to thorough cleaning around the gumline.
Mild, Non-Acidic Meals
On the day of your whitening, try going for simpler, less spicy or less colored meals—like a light sandwich or salad—so your enamel isn’t saturated with strong pigments. If you can’t resist your local sev puri or samosa, rinse or brush soon after to keep your teeth as pigment-free as possible.
Essential Step #3: Pre-Treatment Desensitizing Measures
Use a Desensitizing Toothpaste
One of the easiest ways to prep is switching to a sensitivity-friendly toothpaste about 1–2 weeks before your session. These
Pre-Laser Routine: 3 Essential Steps for a Pain-Free Session
By Dr Pauravi Hegde MDS, Dentist Specializing in Crafting the Perfect Smile
Introduction: Why Laser Whitening is the Talk of Mumbai
Picture this: you’ve decided to invest in a laser teeth whitening session, excited to see your teeth sparkle like your favorite Bollywood star’s. Perhaps you’ve been scrolling through Instagram and seen those dramatic before-and-after shots, or maybe a coworker in Chembur turned heads after their recent whitening appointment. Regardless of how you found out about laser whitening, one question often lingers: How can I make sure it’s as comfortable and effective as possible?
As Dr Pauravi Hegde MDS, I’ve witnessed countless patients from Sion, Prabhadevi, Worli, King’s Circle, and Chunabhatti flock to laser whitening for its speed and bright results. Yet, not everyone realizes how essential the pre-treatment process is. With the right prep, you can dodge discomfort—or worse, an underwhelming outcome—and ensure a glow-up that’s genuinely worth the investment.
In this article, we’ll unveil 3 essential steps for a pain-free laser whitening session. Think of these as the “warm-up stretches” before an intense gym workout: if you skip them, you might power through, but you risk unnecessary aches and complications. Ready to learn how to prime your teeth (and yourself) for an easy, successful whitening experience? Let’s dive in.
Understanding Laser Whitening Basics
How Laser Whitening Works
Laser whitening is a high-tech spin on traditional bleaching methods. Instead of just applying a gel and waiting, your dentist (like me, Dr Pauravi Hegde MDS) uses a laser or specialized light to accelerate the process. This allows the bleaching agents (often hydrogen peroxide or carbamide peroxide) to penetrate tooth enamel more effectively, knocking out stains and discoloration in a shorter time than standard treatments.
- Faster Results: One of the big draws is how quickly it lifts stains—great for last-minute events in Worli or spontaneous photoshoots around King’s Circle.
- Intense Power: Because it uses a more potent gel plus laser activation, you often see dramatic color changes in just one session.
Why Prep Matters
You might wonder: “If the laser is doing all the work, can I just show up?”
Well, you could, but you’d be missing out on crucial steps that minimize pain and boost effectiveness:
- Comfort: Some folks naturally have sensitive teeth or gums. Prepping ensures any existing issues—like mild cavities or gum inflammation—don’t flare up.
- Consistency: Clean, healthy teeth respond better to the bleaching agent, leading to an even, bright outcome.
- Safety: A careful check-up can spot potential pitfalls that might cause trouble mid-session.
Essential Step #1: Schedule a Pre-Whitening Check-Up
Identifying Underlying Dental Issues
Laser whitening is powerful, but power can be a double-edged sword. If you have untreated cavities, gum recession, or hidden fractures in a tooth, shining a laser and applying potent bleaching gels might magnify pain or worsen these issues. A short exam—often just 15–20 minutes—can help your dentist pinpoint problems like:
- Mild cavities: These can become very sensitive if bleaching gel seeps in.
- Tartar build-up: Might interfere with gel penetration, causing uneven results.
- Cracks or fractures: Could let bleaching agents irritate the inner pulp, leading to throbbing pain.
Professional Cleaning
Many patients don’t realize how essential a quick scale and polish is before whitening. Plaque and tartar act like barriers, preventing the gel from uniformly brightening your enamel. By polishing off surface stains or plaque, you’re ensuring the bleaching agent contacts your enamel directly, so each laser pulse is more effective.
Allergy & Sensitivity Check
If you’ve ever used at-home whitening strips or mouthwashes and felt a “zing” or ache, let your dentist know. They might apply a desensitizing gel pre-laser or choose a milder concentration of bleaching agent. This step ensures you don’t squirm in the chair halfway through the session.
A Quick Anecdote from Chembur
One patient from Chembur—let’s call her Rina—booked a laser whitening session on a whim. No pre-exam, no heads-up. Ten minutes in, she felt a sharp jolt. Turns out she had a small cavity brewing. We paused, sealed the cavity, and rescheduled the whitening. She admitted that a quick check-up beforehand would have saved her an extra trip and that uncomfortable surprise.
Essential Step #2: Adjust Your Diet & Habits Pre-Session
Reduce or Avoid Staining Foods
A few days before your appointment, consider cutting down on coffee, tea, red wine, or dark sauces like soy sauce or tamarind-based gravies. Why? If your enamel is already heavily stained, the laser session might need more rounds of gel application, which can mean extended contact time—potentially increasing sensitivity. Also, brightening results can be more noticeable if you’re not layering new stains right before bleaching.
Quit or Cut Down on Smoking
Nicotine not only discolors teeth but also irritates gum tissues. Freshly whitened teeth—especially those about to undergo laser—are more prone to dryness and heightened sensitivity if you smoke heavily. If quitting cold turkey isn’t realistic, at least scale back for a week or so. Trust me, your gums (and lungs) will thank you.
Boost Hydration & Oral Care
- Water is your ally. Drinking enough water flushes out leftover pigments and helps maintain saliva flow, which naturally defends against bacteria and plaque.
- Consistency: Continue your normal brushing routine—twice daily—but pay special attention to thorough cleaning around the gumline.
Mild, Non-Acidic Meals
On the day of your whitening, try going for simpler, less spicy or less colored meals—like a light sandwich or salad—so your enamel isn’t saturated with strong pigments. If you can’t resist your local sev puri or samosa, rinse or brush soon after to keep your teeth as pigment-free as possible.
Essential Step #3: Pre-Treatment Desensitizing Measures
Use a Desensitizing Toothpaste
One of the easiest ways to prep is switching to a sensitivity-friendly toothpaste about 1–2 weeks before your session. These toothpastes contain ingredients like potassium nitrate or stannous fluoride, which help calm the nerve endings inside your teeth. This means that when the high-strength bleaching agent is applied, you’re less likely to experience those sudden “zings.”
Gum Care
Healthy gums are less reactive to strong bleaching agents and the laser’s heat. If your gums are inflamed—from a poor brushing technique or skipping floss—take steps to reduce that inflammation. Some tips include:
- Gentle flossing daily.
- Using an antibacterial mouthwash or saltwater rinses.
- Ensuring your toothbrush is soft-bristled.
Don’t forget to mention any gum concerns to your dentist so they can apply additional gum barriers or protective gels during the laser session if needed.
Communication with Your Dentist
If you’ve had previous experiences with dental work that triggered a gag reflex, or if you recall feeling intense sensitivity during a past whitening procedure, speak up. A good dentist can tweak the procedure—maybe using shorter gel application intervals or applying a desensitizing agent mid-session—to keep you comfortable.
Personal Anecdote: Prabhadevi Patient’s Smart Choice
A patient in Prabhadevi had historically sensitive teeth. She started using a desensitizing toothpaste two weeks before her laser appointment on my recommendation. By the time she came in, her sensitivity threshold had improved significantly. She breezed through the laser session with only minor warmth, describing it as “way easier than I imagined.”
Other Helpful Prep Tips & Considerations
Arrive Relaxed & On Time
In Mumbai, traffic jams can be legendary, whether you’re coming from Sion or King’s Circle. Factor in commute time, so you’re not rushing in breathless. Anxiety can elevate your senses, making you more prone to perceiving mild discomfort as pain. A calm mind and a calm body are your friends here.
Discuss Medication
If you have a low pain threshold or high dental anxiety, some dentists might suggest an over-the-counter pain reliever or anti-anxiety med before the session. However, always consult your dentist first—don’t self-medicate, as some medications can interfere with the bleaching process or your body’s response.
Plan Your Day
Try not to schedule a heavy meal or strong caffeine binge right before your appointment. Acidic or sugary foods could heighten sensitivity. Also, keep a relatively free schedule afterward—while most people feel fine, you might prefer to rest at home if your teeth or gums feel a tad sensitive.
Set Realistic Expectations
One session of laser whitening often produces impressive brightness—some see improvements of 2–7 shades—but if your teeth have deep, intrinsic stains, you may need additional rounds. Knowing this beforehand helps you stay calm if you don’t hit “snow-white” in one go.
Common Pre-Laser FAQs
1. “Is Laser Whitening Painful?”
In most cases, no. People describe it as feeling a mild warmth or seeing a bright light while the gel is on. Some might experience fleeting sensitivity, but it’s usually short-lived and easily managed. Following the steps above significantly reduces discomfort.
2. “Will My Gums Get Burned?”
Not if done properly. A qualified dentist applies protective barriers over your gums to shield them from direct contact with the bleaching gel or laser. Burn incidents usually arise from untrained or rushed application.
3. “How Long Does a Typical Session Last?”
Plan on about 30–60 minutes total, though this can vary. The actual whitening part might be a few 10–15 minute intervals, but prepping your teeth, applying barriers, and post-checking can extend the total time.
4. “Can I Eat Right After?”
Yes, but it’s best to avoid dark or acidic foods for at least 24 hours post-whitening to preserve those results and minimize sensitivity. Some people stay on a “white diet” (e.g., lightly colored foods and beverages) for a short period for optimal results.
Patient Stories: Successes & Lessons
Chembur Office-Goer
A 29-year-old marketing professional from Chembur scheduled a lunch-break laser whitening without a pre-check. She found out mid-session she had mild gum swelling near one tooth, which caused some stinging when the gel contacted that spot. While we managed it, it lengthened her appointment, and she had to hurry back to work. Moral: a 5-minute check-up could have identified the swollen gum sooner, simplifying the procedure.
Worli Party Planner
An event organizer in Worli had a major VIP wedding to oversee and wanted a dazzling smile. She diligently avoided her daily black coffee for four days, used a desensitizing toothpaste, and arrived at the clinic with calm composure. The result? A painless, 30-minute laser session with minimal gum irritation and an instant 5-shade lift.
Sion Student
A college student from Sion found her teeth extra sensitive if she brushed too vigorously. Fearing the laser session would hurt, she mentioned this to me, Dr Pauravi Hegde MDS, during her consult. We shortened each gel application to 8-minute rounds and applied a pre-desensitizing gel. The entire process flew by without a single wince, and her confidence soared just in time for her graduation photos.
Conclusion & Final Invitation
Recap the 3 Essential Steps
- Schedule a Pre-Whitening Check-Up: Catch cavities, gum issues, or plaque build-up that could cause pain or uneven results.
- Adjust Diet & Habits: Cut down on staining foods, consider pausing smoking, and keep yourself well-hydrated to create an ideal environment for bleaching.
- Pre-Treatment Desensitizing Measures: Use sensitive-friendly toothpaste, maintain healthy gums, and talk openly with your dentist about past pain or anxieties.
Reassure Mumbaikars
Whether you’re commuting from Chunabhatti, hailing from Prabhadevi, or staying in King’s Circle, these steps don’t demand extreme effort—they just require awareness and consistency. By ticking off each box, you can transform your laser whitening experience into a smooth, pain-free event that leaves you with a mesmerizing, brighter smile.
Call to Action
If you’ve been toying with the idea of laser whitening—or you’ve already booked a session and want it to be a breeze—put these tips into action now. Let your dentist (or me, Dr Pauravi Hegde MDS) know about any specific concerns so we can fine-tune the approach.
Finally, remember: a confident, pain-free whitening session isn’t just about the laser; it’s about what you do in the days and weeks leading up to it. So go forth, prepare wisely, and get ready to dazzle Mumbai with your newfound brilliance!
WhiteRock Dental Clinic
807 B, Lodha Supremus, New Cuffe Parade, Wadala East, Mumbai 400037, India
All content on this blog is copyright © 2024 by whiterockdental.in. Unauthorized reproduction or distribution is prohibited. For inquiries, please contact us via our website.